Category Don’t repeat yourself (DRY)

Single responsibility principle (SRP) – Architectural Principles-1

Essentially, the SRP means that a single class should hold one, and only one, responsibility, leading me to the following quote:

“There should never be more than one reason for a class to change.”— Robert C. Martin, originator of the single responsibility principle

OK, but why? Before answering, take a moment to remember a project you’ve worked on where someone changed one or more requirements along the way. I recall several projects that would have benefited from this principle. Now, imagine how much simpler it would have been if each part of your system had just one job: one reason to change.

Software maintainability problems can be due to both tech and non-tech people. Nothing is purely black or white—most things are a shade of gray. The same applies to software design: always do your best, learn from your mistakes, and stay humble (a.k.a. continuous improvement).

By understanding that applications are born to change, you will feel better when that happens, while the SRP helps mitigate the impact of changes. For example, it helps make our classes more readable and reusable and to create more flexible and maintainable systems. Moreover, when a class does only one thing, it’s easier to see how changes will affect the system, which is more challenging with complex classes since one change might break other parts. Furthermore, fewer responsibilities mean less code. Less code is easier to understand, helping you grasp that part of the software more quickly.Let’s try this out in action.

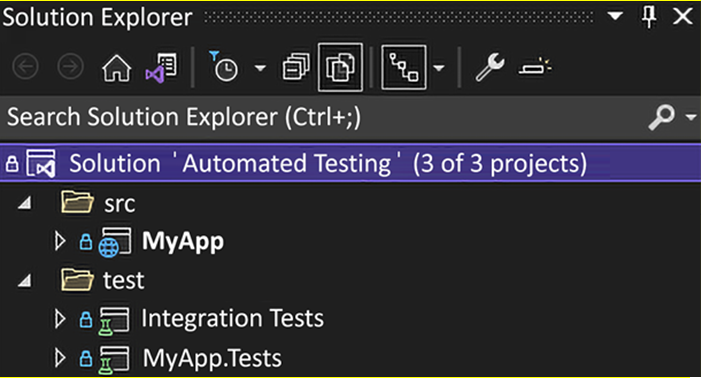
Project – Single Responsibility

First, we look at the Product class used in both code samples. That class represents a simple fictive product:

public record class Product(int Id, string Name);

The code sample has no implementation because it is irrelevant to understanding the SRP. We focus on the class API instead. Please assume we implemented the data-access logic using your favorite database.

The following class breaks the SRP:

namespace BeforeSRP;
public class ProductRepository
{
    public ValueTask<Product> GetOnePublicProductAsync(int productId)
        => throw new NotImplementedException();
    public ValueTask<Product> GetOnePrivateProductAsync(int productId)
        => throw new NotImplementedException();
    public ValueTask<IEnumerable<Product>> GetAllPublicProductsAsync()
        => throw new NotImplementedException();
    public ValueTask<IEnumerable<Product>> GetAllPrivateProductsAsync()
        => throw new NotImplementedException();
    public ValueTask CreateAsync(Product product)
        => throw new NotImplementedException();
    public ValueTask UpdateAsync(Product product)
        => throw new NotImplementedException();
    public ValueTask DeleteAsync(Product product)
        => throw new NotImplementedException();
}

What does not conform to the SRP in the preceding class? By reading the name of the methods, we can extract two responsibilities:

  • Handling public products (highlighted code).
  • Handling private products.

Keep it simple, stupid (KISS) – Architectural Principles

This is another straightforward principle, yet one of the most important. Like in the real world, the more moving pieces, the more chances something breaks. This principle is a design philosophy that advocates for simplicity in design. It emphasizes the idea that systems work best when they are kept simple rather than made complex.Striving for simplicity might involve writing shorter methods or functions, minimizing the number of parameters, avoiding over-architecting, and choosing the simplest solution to solve a problem.Adding interfaces, abstraction layers, and complex object hierarchy adds complexity, but are the added benefits better than the underlying complexity? If so, they are worth it; otherwise, they are not.

As a guiding principle, when you can write the same program with less complexity, do it. This is also why predicting future requirements can often prove detrimental, as it may inadvertently inject unnecessary complexity into your codebase for features that might never materialize.

We study design patterns in the book and design systems using them. We learn how to apply a high degree of engineering to our code, which can lead to over-engineering if done in the wrong context. Towards the end of the book, we circle back on the KISS principle when exploring the vertical slice architecture and request-endpoint-response (REPR) patterns.Next, we delve into the SOLID principles, which are the key to flexible software design.

The SOLID principles

SOLID is an acronym representing five principles that extend the basic OOP concepts of Abstraction, Encapsulation, Inheritance, and Polymorphism. They add more details about what to do and how to do it, guiding developers toward more robust and flexible designs.It is crucial to remember that these are just guiding principles, not rules that you must follow, no matter what. Think about what makes sense for your specific project. If you’re building a small tool, it might be acceptable not to follow these principles as strictly as you would for a crucial business application. In the case of business-critical applications, it might be a good idea to stick to them more closely. Still, it’s usually a smart move to follow them, no matter the size of your app. That’s why we’re discussing them before diving into design patterns.The SOLID acronym represents the following:

  • Single responsibility principle
  • Open/Closed principle
  • Liskov substitution principle
  • Interface segregation principle
  • Dependency inversion principle

By following these principles, your systems should become easier to test and maintain.

Important testing principles – Automated Testing

Finally, we can create a dedicated class that instantiates WebApplicationFactory manually. It leverages the other workarounds but makes the test cases more readable. By encapsulating the setup of the test application in a class, you will improve the reusability and maintenance cost in most cases.First, we need to change the Program class visibility by adding the following line to the Project.cs file:

public partial class Program { }

Now that we can access the Program class without the need to allow internal visibility to our test project, we can create our test application like this:

namespace MyMinimalApiApp;
public class MyTestApplication : WebApplicationFactory<Program> {}

Finally, we can reuse the same code to test our program but instantiate MyTestApplication instead of WebApplicationFactory<Program>, highlighted in the following code:

namespace MyMinimalApiApp;
public class MyTestApplicationTest
{
    public class Get : ProgramTestWithoutFixture
    {
        [Fact]
        public async Task Should_respond_a_status_200_OK()
        {
            // Arrange
            await using var app = new MyTestApplication();
            var httpClient = app.CreateClient();
            // Act
            var result = await httpClient.GetAsync(“/”);
            // Assert
            Assert.Equal(HttpStatusCode.OK, result.StatusCode);
        }
    }
}

You can also leverage fixtures, but for the sake of simplicity, I decided to show you how to instantiate our new test application manually.And that’s it. We have covered multiple ways to work around integration testing minimal APIs simplistically and elegantly. Next, we explore a few testing principles before moving to architectural principles in the next chapter.

Important testing principles

One essential thing to remember when writing tests is to test use cases, not the code itself; we are testing features’ correctness, not code correctness. Of course, if the expected outcome of a feature is correct, that also means the codebase is correct. However, it is not always true the other way around; correct code may yield an incorrect outcome. Also, remember that code costs money to write, while features deliver value.To help with that, test requirements should revolve around inputs and outputs. When specific values go into your subject under test, you expect particular values to come out. Whether you are testing a simple Add method where the ins are two or more numbers, and the out is the sum of those numbers, or a more complex feature where the ins come from a form, and the out is the record getting persisted in a database, most of the time, we are testing that inputs produced an output or an outcome.Another concept is to divide those units as a query or a command. No matter how you organize your code, from a simple single-file application to a microservices architecture-base Netflix clone, all simple or compounded operations are queries or commands. Thinking about a system this way should help you test the ins and outs. We discuss queries and commands in several chapters, so keep reading to learn more.Now that we have laid this out, what if a unit must perform multiple operations, such as reading from a database, and then send multiple commands? You can create and test multiple smaller units (individual operations) and another unit that orchestrates those building blocks, allowing you to test each piece in isolation. We explore how to achieve this throughout the book.In a nutshell, when writing automated tests:

  • In case of a query, we assert the output of the unit undergoing testing based on its input parameters.
  • In case of a command, we assert the outcome of the unit undergoing testing based on its input parameters.

We explore numerous techniques throughout the book to help you achieve that level of separation, starting with architectural principles in the next chapter.

Summary

This chapter covered automated testing, such as unit and integration tests. We also briefly covered end-to-end tests, but covering that in only a few pages is impossible. Nonetheless, how to write integration tests can also be used for end-to-end testing, especially in the REST API space.We explored different testing approaches from a bird’s eye view, tackled technical debt, and explored multiple testing techniques like black-box, white-box, and grey-box testing. We also peaked at a few formal ways to choose the values to test, like equivalence partitioning and boundary value analysis.We then looked at xUnit, the testing framework used throughout the book, and a way of organizing tests. We explored ways to pick the correct type of test and some guidelines about choosing the right quantity for each kind of test. Then we saw how easy it is to test our ASP.NET Core web applications by running it in memory. Finally, we explored high-level concepts that should guide you in writing testable, flexible, and reliable programs.Now that we have talked about testing, we are ready to explore a few architectural principles to help us increase programs’ testability. Those are a crucial part of modern software engineering and go hand in hand with automated testing.

Writing ASP.NET Core integration tests – Automated Testing

When Microsoft built ASP.NET Core from the ground up, they fixed and improved so many things that I cannot enumerate them all here, including testability.Nowadays, there are two ways to structure a .NET program:

  • The classic ASP.NET Core Program and the Startup classes. This model might be found in existing projects (created before .NET 6).
  • The minimal hosting model introduced in .NET 6. This may look familiar to you if you know Node.js, as this model encourages you to write the start-up code in the Program.cs file by leveraging top-level statements. You will most likely find this model in new projects (created after the release of .NET 6).

No matter how you write your program, that’s the place to define how the application’s composition and how it boots. Moreover, we can leverage the same testing tools more or less seamlessly.In the case of a web application, the scope of our integration tests is often to call the endpoint of a controller over HTTP and assert the response. Luckily, in .NET Core 2.1, the .NET team added the WebApplicationFactory<TEntry> class to make the integration testing of web applications easier. With that class, we can boot up an ASP.NET Core application in memory and query it using the supplied HttpClient in a few lines of code. The test classes also provide extension points to configure the server, such as replacing implementations with mocks, stubs, or other test-specific elements.Let’s start by booting up a classic web application test.

Classic web application

In a classic ASP.NET Core application, the TEntry generic parameter of the WebApplicationFactory<TEntry> class is usually the Startup or Program class of your project under test.

The test cases are in the Automated Testing solution under the MyApp.IntegrationTests project.

Let’s start by looking at the test code structure before breaking it down:

namespace MyApp.IntegrationTests.Controllers;
public class ValuesControllerTest : IClassFixture<WebApplicationFactory<Startup>>
{
    private readonly HttpClient _httpClient;
    public ValuesControllerTest(
        WebApplicationFactory<Startup> webApplicationFactory)
    {
        _httpClient = webApplicationFactory.CreateClient();
    }
    public class Get : ValuesControllerTest
    {
        public Get(WebApplicationFactory<Startup> webApplicationFactory)
            : base(webApplicationFactory) { }
        [Fact]
        public async Task Should_respond_a_status_200_OK()
        {
            // Omitted Test Case 1
        }
        [Fact]
        public async Task Should_respond_the_expected_strings()
        {
            // Omitted Test Case 2
        }
    }
}

The first piece of the preceding code that is relevant to us is how we get an instance of the WebApplicationFactory<Startup> class. We inject a WebApplicationFactory<Startup> object into the constructor by implementing the IClassFixture<T> interface (a xUnit feature). We can also use the factory to configure the test server, but we don’t need to here, so we can only keep a reference on the HttpClient, preconfigured to connect to the in-memory test server.Then, we may have noticed we have the nested Get class that inherits the ValuesControllerTest class. The Get class contains the test cases. By inheriting the ValuesControllerTest class, we can leverage the _httpClient field from the test cases we are about to see.In the first test case, we use HttpClient to query the http://localhost/api/values URI, accessible through the in-memory server. Then, we assert that the status code of the HTTP response was a success (200 OK):

[Fact]
public async Task Should_respond_a_status_200_OK()
{
    // Act
    var result = await _httpClient
        .GetAsync(“/api/values”);
    // Assert
    Assert.Equal(HttpStatusCode.OK, result.StatusCode);
}

The second test case also sends an HTTP request to the in-memory server but deserializes the body’s content as a string[] to ensure the values are the same as expected instead of validating the status code:

[Fact]
public async Task Should_respond_the_expected_strings()
{
    // Act
    var result = await _httpClient
        .GetFromJsonAsync<string[]>(“/api/values”);
    // Assert
    Assert.Collection(result,
        x => Assert.Equal(“value1”, x),
        x => Assert.Equal(“value2”, x)
    );
}

As you may have noticed from the test cases, the WebApplicationFactory preconfigured the BaseAddress property for us, so we don’t need to prefix our requests with http://localhost.

When running those tests, an in-memory web server starts. Then, HTTP requests are sent to that server, testing the complete application. The tests are simple in this case, but you can create more complex test cases in more complex programs.Next, we explore how to do the same for minimal APIs.

Organizing your tests – Automated Testing

There are many ways of organizing test projects inside a solution, and I tend to create a unit test project for each project in the solution and one or more integration test projects.A unit test is directly related to a single unit of code, whether it’s a method or a class. It is straightforward to associate a unit test project with its respective code project (assembly), leading to a one-on-one relationship. One unit test project per assembly makes them portable, easier to navigate, and even more so when the solution grows.

If you have a preferred way to organize yours that differs from what we are doing in the book, by all means, use that approach instead.

Integration tests, on the other hand, can span multiple projects, so having a single rule that fits all scenarios is challenging. One integration test project per solution is often enough. Sometimes we can need more than one, depending on the context.

I recommend starting with one integration test project and adding more as needed during development instead of overthinking it before getting started. Trust your judgment; you can always change the structure as your project evolves.

Folder-wise, at the solution level, creating the application and its related libraries in an src directory helps isolate the actual solution code from the test projects created under a test directory, like this:

 Figure 2.7: The Automated Testing Solution Explorer, displaying how the projects are organizedFigure 2.7: The Automated Testing Solution Explorer, displaying how the projects are organized 

That’s a well-known and effective way of organizing a solution in the .NET world.

Sometimes, it is not possible or unwanted to do that. One such use case would be multiple microservices written under a single solution. In that case, you might want the tests to live closer to your microservices and not split them between src and test folders. So you could organize your solution by microservice instead, like one directory per microservice that contains all the projects, including tests.

Let’s now dig deeper into organizing unit tests.

Unit tests

How you organize your test projects may make a big difference between searching for your tests or making it easy to find them. Let’s look at the different aspects, from the namespace to the test code itself.

Namespace

I find it convenient to create unit tests in the same namespace as the subject under test when creating unit tests. That helps get tests and code aligned without adding any additional using statements. To make it easier when creating files, you can change the default namespace used by Visual Studio when creating a new class in your test project by adding <RootNamespace>[Project under test namespace]</RootNamespace> to a PropertyGroup of the test project file (*.csproj), like this:<PropertyGroup>
  …
<RootNamespace>MyApp</RootNamespace>
</PropertyGroup>

Theories – Automated Testing-2

The third data feeds three more sets of data to the test method. However, that data originates from the GetData method of the ExternalData class, sending 10 as an argument during the execution (the start parameter). To do that, we must specify the MemberType instance where the method is located so xUnit knows where to look. In this case, we pass the argument 10 as the second parameter of the MemberData constructor. However, in other cases, you can pass zero or more arguments there.Finally, we are doing the same for the ExternalData.TypedData property, which is represented by the [MemberData(nameof(ExternalData.TypedData), MemberType = typeof(ExternalData))] attribute. Once again, the only difference is that the property is defined using TheoryData instead of IEnumerable<object[]>, which makes its intent clearer.When running the tests, the data provided by the [MemberData] attributes are combined, yielding the following result in the Test Explorer:

 Figure 2.5: Member data theory test resultsFigure 2.5: Member data theory test results 

These are only a few examples of what we can do with the [MemberData] attribute.

I understand that’s a lot of condensed information, but the goal is to cover just enough to get you started. I don’t expect you to become an expert in xUnit by reading this chapter.

Last but not least, the [ClassData] attribute gets its data from a class implementing IEnumerable<object[]> or inheriting from TheoryData<…>. The concept is the same as the other two. Here is an example:

public class ClassDataTest
{
    [Theory]
    [ClassData(typeof(TheoryDataClass))]
    [ClassData(typeof(TheoryTypedDataClass))]
    public void Should_be_equal(int value1, int value2, bool shouldBeEqual)
    {
        if (shouldBeEqual)
        {
            Assert.Equal(value1, value2);
        }
        else
        {
            Assert.NotEqual(value1, value2);
        }
    }
    public class TheoryDataClass : IEnumerable<object[]>
    {
        public IEnumerator<object[]> GetEnumerator()
        {
            yield return new object[] { 1, 2, false };
            yield return new object[] { 2, 2, true };
            yield return new object[] { 3, 3, true };
        }
        IEnumerator IEnumerable.GetEnumerator() => GetEnumerator();
    }
    public class TheoryTypedDataClass : TheoryData<int, int, bool>
    {
        public TheoryTypedDataClass()
        {
            Add(102, 104, false);
        }
    }
}

These are very similar to [MemberData], but we point to a type instead of pointing to a member.In TheoryDataClass, implementing the IEnumerable<object[]> interface makes it easy to yield return the results. On the other hand, in the TheoryTypedDataClass class, by inheriting TheoryData, we can leverage a list-like Add method. Once again, I find inheriting from TheoryData more explicit, but either way works with xUnit. You have many options, so choose the best one for your use case.Here is the result in the Test Explorer, which is very similar to the other attributes:

 Figure 2.6: Test ExplorerFigure 2.6: Test Explorer 

That’s it for the theories—next, a few last words before organizing our tests.

Theories – Automated Testing-1

For more complex test cases, we can use theories. A theory contains two parts:

  • A [Theory] attribute that marks the method as a theory.
  • At least one data attribute that allows passing data to the test method: [InlineData], [MemberData], or [ClassData].

When writing a theory, your primary constraint is ensuring that the number of values matches the parameters defined in the test method. For example, a theory with one parameter must be fed one value. We look at some examples next.

You are not limited to only one type of data attribute; you can use as many as you need to suit your needs and feed a theory with the appropriate data.

The [InlineData] attribute is the most suitable for constant values or smaller sets of values. Inline data is the most straightforward way of the three because of the proximity of the test values and the test method.Here is an example of a theory using inline data:

public class InlineDataTest
{
    [Theory]
    [InlineData(1, 1)]
    [InlineData(2, 2)]
    [InlineData(5, 5)]
    public void Should_be_equal(int value1, int value2)
    {
        Assert.Equal(value1, value2);
    }
}

That test method yields three test cases in the Test Explorer, where each can pass or fail individually. Of course, since 1 equals 1, 2 equals 2, and 5 equals 5, all three test cases are passing, as shown here:

 Figure 2.4: Inline data theory test resultsFigure 2.4: Inline data theory test results 

We can also use the [MemberData] and [ClassData] attributes to simplify the test method’s declaration when we have a large set of data to tests. We can also do that when it is impossible to instantiate the data in the attribute. We can also reuse the data in multiple test methods or encapsulate the data away from the test class.Here is a medley of examples of the [MemberData] attribute usage:

public class MemberDataTest
{
    public static IEnumerable<object[]> Data => new[]
    {
        new object[] { 1, 2, false },
        new object[] { 2, 2, true },
        new object[] { 3, 3, true },
    };
    public static TheoryData<int, int, bool> TypedData =>new TheoryData<int, int, bool>
    {
        { 3, 2, false },
        { 2, 3, false },
        { 5, 5, true },
    };
    [Theory]
    [MemberData(nameof(Data))]
    [MemberData(nameof(TypedData))]
    [MemberData(nameof(ExternalData.GetData), 10, MemberType = typeof(ExternalData))]
    [MemberData(nameof(ExternalData.TypedData), MemberType = typeof(ExternalData))]
    public void Should_be_equal(int value1, int value2, bool shouldBeEqual)
    {
        if (shouldBeEqual)
        {
            Assert.Equal(value1, value2);
        }
        else
        {
            Assert.NotEqual(value1, value2);
       }
    }
    public class ExternalData
    {
        public static IEnumerable<object[]> GetData(int start) => new[]
        {
            new object[] { start, start, true },
            new object[] { start, start + 1, false },
            new object[] { start + 1, start + 1, true },
        };
        public static TheoryData<int, int, bool> TypedData => new TheoryData<int, int, bool>
        {
            { 20, 30, false },
            { 40, 50, false },
            { 50, 50, true },
        };
    }
}

The preceding test case yields 12 results. If we break it down, the code starts by loading three sets of data from the Data property by decorating the test method with the [MemberData(nameof(Data))] attribute. This is how to load data from a member of the class the test method is declared in.Then, the second property is very similar to the Data property but replaces IEnumerable<object[]> with a TheoryData<…> class, making it more readable and type-safe. Like with the first attribute, we feed those three sets of data to the test method by decorating it with the [MemberData(nameof(TypedData))] attribute. Once again, it is part of the test class.

I strongly recommend using TheoryData<…> by default.

How to create an xUnit test project – Automated Testing

To create a new xUnit test project, you can run the dotnet new xunit command, and the CLI does the job for you by creating a project containing a UnitTest1 class. That command does the same as creating a new xUnit project from Visual Studio.For unit testing projects, name the project the same as the project you want to test and append .Tests to it. For example, MyProject would have a MyProject.Tests project associated with it. We explore more details in the Organizing your tests section below.The template already defines all the required NuGet packages, so you can start testing immediately after adding a reference to your project under test.

You can also add project references using the CLI with the dotnet add reference command. Assuming we are in the ./test/MyProject.Tests directory and the project file we want to reference is in the ./src/MyProject directory; we can execute the following command to add a reference:

dotnet add reference ../../src/MyProject.csproj.

Next, we explore some xUnit features that will allow us to write test cases.

Key xUnit features

In xUnit, the [Fact] attribute is the way to create unique test cases, while the [Theory] attribute is the way to make data-driven test cases. Let’s start with facts, the simplest way to write a test case.

Facts

Any method with no parameter can become a test method by decorating it with a [Fact] attribute, like this:

public class FactTest
{
    [Fact]
    public void Should_be_equal()
    {
        var expectedValue = 2;
        var actualValue = 2;
        Assert.Equal(expectedValue, actualValue);
    }
}

You can also decorate asynchronous methods with the fact attribute when the code under test needs it:

public class AsyncFactTest
{
    [Fact]
    public async Task Should_be_equal()
    {
        var expectedValue = 2;
        var actualValue = 2;
        await Task.Yield();
        Assert.Equal(expectedValue, actualValue);
    }
}

In the preceding code, the highlighted line conceptually represents an asynchronous operation and does nothing more than allow using the async/await keywords.When we run the tests from Visual Studio’s Test Explorer, the test run result looks like this:

 Figure 2.3: Test results in Visual StudioFigure 2.3: Test results in Visual Studio 

You may have noticed from the screenshot that the test classes are nested in the xUnitFeaturesTest class, part of the MyApp namespace, and under the MyApp.Tests project. We explore those details later in the chapter.Running the dotnet test CLI command should yield a result similar to the following:

Passed! 
– Failed:     0, Passed:    23, Skipped:     0, Total:    23, Duration: 22 ms – MyApp.Tests.dll (net8.0)

As we can read from the preceding output, all tests are passing, none have failed, and none were skipped. It is as simple as that to create test cases using xUnit.

Learning the CLI can be very helpful in creating and debugging CI/CD pipelines, and you can use them, like the dotnet test command, in any script (like bash and PowerShell).

Have you noticed the Assert keyword in the test code? If you are not familiar with it, we will explore assertions next.

Conclusion – Automated Testing

White-box testing includes unit and integration tests. Those tests run fast, and developers use them to improve the code and test complex algorithms. However, writing a large quantity of those tests takes time. Writing brittle tests that are tightly coupled with the code itself is easier due to the proximity to the code, increasing the maintenance cost of such test suites. It also makes it prone to overengineering your application in the name of testability.Black-box testing encompasses different types of tests that tend towards end-to-end testing. Since the tests target the external surface of the system, they are less likely to break when the system changes. Moreover, they are excellent at testing behaviors, and since each test tests an end-to-end use case, we need fewer of them, leading to a decrease in writing time and maintenance costs. Testing the whole system has drawbacks, including the slowness of executing each test, so combining black-box testing with other types of tests is very important to find the right balance between the number of tests, test case coverage, and speed of execution of the tests.Grey-box testing is a fantastic mix between the two others; you can treat any part of the software as a black box, leverage your inner-working knowledge to mock or stub parts of the test case (like to assert if the system persisted a record in the database), and test end-to-end scenarios more efficiently. It brings the best of both worlds, significantly reducing the number of tests while increasing the test surface considerably for each test case. However, doing grey-box testing on smaller units or heavily mocking the system may yield the same drawbacks as white-box testing. Integration tests or almost-E2E tests are good candidates for grey-box testing. We implement grey-box testing use cases in Chapter 16, Request-Endpoint-Response (REPR). Meanwhile, let’s explore a few techniques to help optimize our test case creation by applying different techniques, like testing a small subset of values to assert the correctness of our programs by writing an optimal number of tests.

Test case creation

Multiple ways exist to break down and create test cases to help find software defects with a minimal test count. Here are some techniques to help minimize the number of tests while maximizing the test coverage:

  • Equivalence Partitioning
  • Boundary Value Analysis
  • Decision Table Testing
  • State Transition Testing
  • Use Case Testing

I present the techniques theoretically. They apply to all sorts of tests and should help you write better test suites. Let’s have a quick look at each.

Black-box testing – Automated Testing

Black-box testing is a software testing method where a tester examines an application’s functionality without knowing the internal structure or implementation details. This form of testing focuses solely on the inputs and outputs of the system under test, treating the software as a “black box” that we can’t see into.The main goal of black-box testing is to evaluate the system’s behavior against expected results based on requirements or user stories. Developers writing the tests do not need to know the codebase or the technology stack used to build the software.We can use black-box testing to assess the correctness of several types of requirements, like:

  1. Functional testing: This type of testing is related to the software’s functional requirements, emphasizing what the system does, a.k.a. behavior verification.
  2. Non-functional testing: This type of testing is related to non-functional requirements such as performance, usability, reliability, and security, a.k.a. performance evaluation.
  3. Regression testing: This type of testing ensures the new code does not break existing functionalities, a.k.a. change impact.

Next, let’s explore a hybrid between white-box and black-box testing.

Grey-box testing

Grey-box testing is a blend between white-box and black-box testing. Testers need only partial knowledge of the application’s internal workings and use a combination of the software’s internal structure and external behavior to craft their tests.We implement grey-box testing use cases in Chapter 16, Request-Endpoint-Response (REPR). Meanwhile, let’s compare the three techniques.

White-box vs. Black-box vs. Grey-box testing

To start with a concise comparison, here’s a table that compares the three broad techniques:

FeatureWhitebox TestingBlackbox TestingGray-box Testing
DefinitionTesting based on the internal design of the softwareTesting based on the behavior and functionality of the softwareTesting that combines the internal design and behavior of the software
Knowledge of code requiredYesNoYes
Types of defects foundLogic, data structure, architecture, and performance issuesFunctionality, usability, performance, and security issuesMost types of issues
Coverage per testSmall; targeted on a unitLarge; targeted on a use caseUp to large; can vary in scope
TestersUsually performed by developers.Testers can write the tests without specific technical knowledge of the application’s internal structure.Developers can write the tests, while testers also can with some knowledge of the code.
When to use each style?Write unit tests to validate complex algorithms or code that yields multiple results based on many inputs. These tests are usually high-speed so you can have many of them.Write if you have specific scenarios you want to test, like UI tests, or if testers and developers are two distinct roles in your organization. These usually run the slowest and require you to deploy the application to test it. You want as few as possible to improve the feedback time.Write to avoid writing black-box or white-box tests. Layer the tests to cover as much as possible with as few tests as possible. Depending on the application’s architecture, this type of test can yield optimal results for many scenarios.

Let’s conclude next and explore a few advantages and disadvantages of each technique.