By convention, I name test classes [class under test]Test.cs and create them in the same directory as in the original project. Finding tests is easy when following that simple rule since the test code is in the same location of the file tree as the code under test but in two distinct projects.
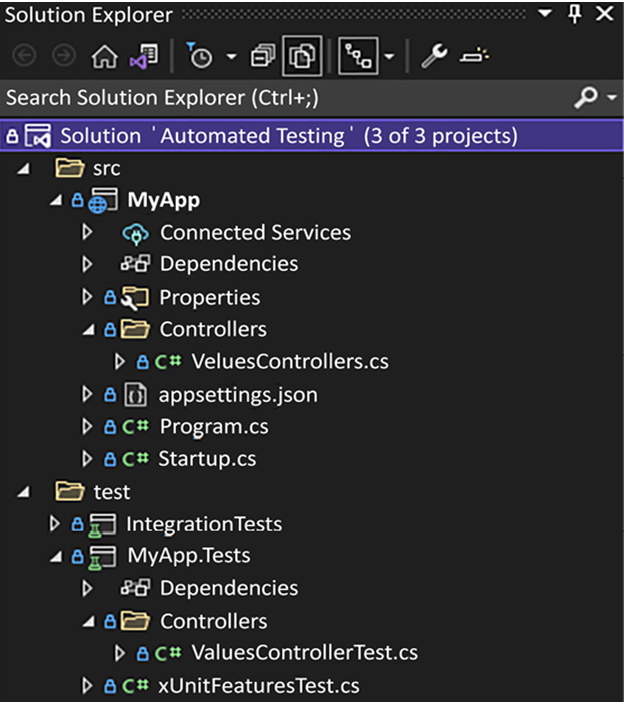
Figure 2.8: The Automated Testing Solution Explorer, displaying how tests are organized
Test code inside the test class
For the test code itself, I follow a multi-level structure similar to the following:
- One test class is named the same as the class under test.
- One nested test class per method to test from the class under test.
- One test method per test case of the method under test.
This technique helps organize tests by test case while keeping a clear hierarchy, leading to the following hierarchy:
- Class under test
- Method under test
- Test case using that method
In code, that translates to the following:
namespace MyApp.IntegrationTests.Controllers;
public class ValuesControllerTest
{
public class Get : ValuesControllerTest
{
[Fact]
public void Should_return_the_expected_strings()
{
// Arrange
var sut = new ValuesController();
// Act
var result = sut.Get();
// Assert
Assert.Collection(result.Value,
x => Assert.Equal(“value1”, x),
x => Assert.Equal(“value2”, x)
);
}
}
}
This convention allows you to set up tests step by step. For example, by inheriting the outer class (the ValuesControllerTest class here) from the inner class (the Get nested class), you can create top-level private mocks or classes shared by all nested classes and test methods. Then, for each method to test, you can modify the setup or create other private test elements in the nested classes. Finally, you can do more configuration per test case inside the test method (the Should_return_the_expected_strings method here).
Don’t go too hard on reusability inside your test classes, as it can make tests harder to read from an external eye, such as a reviewer or another developer that needs to play there. Unit tests should remain focused, small, and easy to read: a unit of code testing another unit of code. Too much reusability may lead to a brittle test suite.
Now that we have explored organizing unit tests, let’s look at integration tests.
Integration tests
Integration tests are harder to organize because they depend on multiple units, can cross project boundaries, and interact with various dependencies.We can create one integration test project for most simple solutions or many for more complex scenarios.When creating one, you can name the project IntegrationTests or start with the entry point of your tests, like a REST API project, and name the project [Name of the API project].IntegrationTests. At this point, how to name the integration test project depends on your solution structure and intent.When you need multiple integration projects, you can follow a convention similar to unit tests and associate your integration projects one-to-one: [Project under test].IntegrationTests.Inside those projects, it depends on how you want to attack the problem and the structure of the solution itself. Start by identifying the features under test. Name the test classes in a way that mimics your requirements, organize those into sub-folders (maybe a category or group of requirements), and code test cases as methods. You can also leverage nested classes, as we did with unit tests.
We write tests throughout the book, so you will have plenty of examples to make sense of all this if it’s not clear now.
Next, we implement an integration test by leveraging ASP.NET Core features.