There are many ways of organizing test projects inside a solution, and I tend to create a unit test project for each project in the solution and one or more integration test projects.A unit test is directly related to a single unit of code, whether it’s a method or a class. It is straightforward to associate a unit test project with its respective code project (assembly), leading to a one-on-one relationship. One unit test project per assembly makes them portable, easier to navigate, and even more so when the solution grows.
If you have a preferred way to organize yours that differs from what we are doing in the book, by all means, use that approach instead.
Integration tests, on the other hand, can span multiple projects, so having a single rule that fits all scenarios is challenging. One integration test project per solution is often enough. Sometimes we can need more than one, depending on the context.
I recommend starting with one integration test project and adding more as needed during development instead of overthinking it before getting started. Trust your judgment; you can always change the structure as your project evolves.
Folder-wise, at the solution level, creating the application and its related libraries in an src directory helps isolate the actual solution code from the test projects created under a test directory, like this:
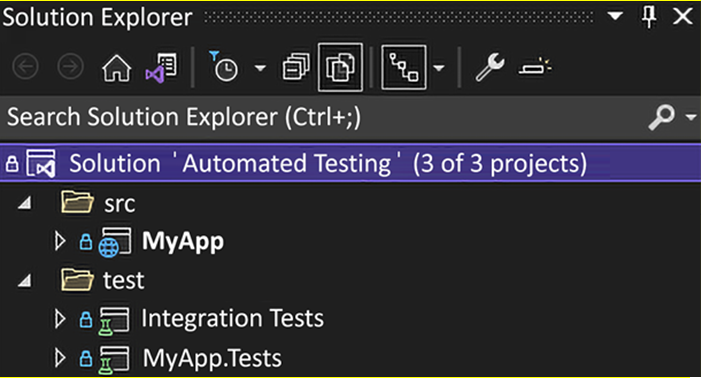
Figure 2.7: The Automated Testing Solution Explorer, displaying how the projects are organized
That’s a well-known and effective way of organizing a solution in the .NET world.
Sometimes, it is not possible or unwanted to do that. One such use case would be multiple microservices written under a single solution. In that case, you might want the tests to live closer to your microservices and not split them between src and test folders. So you could organize your solution by microservice instead, like one directory per microservice that contains all the projects, including tests.
Let’s now dig deeper into organizing unit tests.
Unit tests
How you organize your test projects may make a big difference between searching for your tests or making it easy to find them. Let’s look at the different aspects, from the namespace to the test code itself.
Namespace
I find it convenient to create unit tests in the same namespace as the subject under test when creating unit tests. That helps get tests and code aligned without adding any additional using statements. To make it easier when creating files, you can change the default namespace used by Visual Studio when creating a new class in your test project by adding <RootNamespace>[Project under test namespace]</RootNamespace> to a PropertyGroup of the test project file (*.csproj), like this:<PropertyGroup>
…
<RootNamespace>MyApp</RootNamespace>
</PropertyGroup>